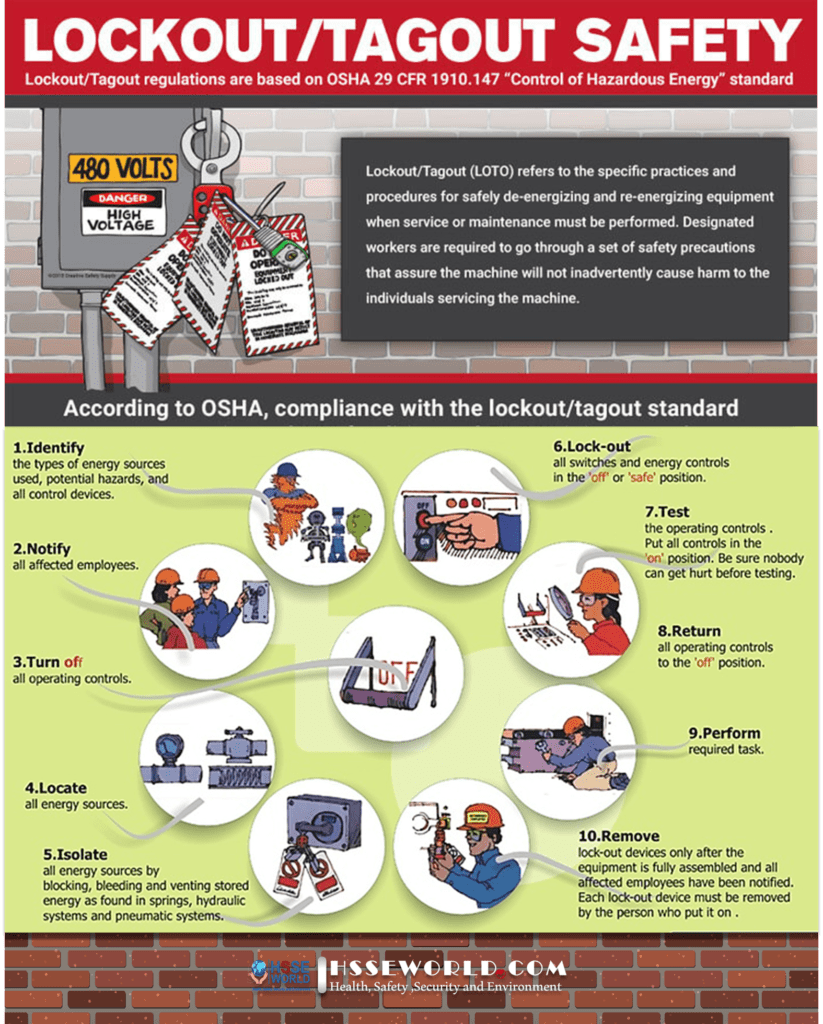
Lockout and Tagout (LOTO) is a set of procedures that are used to ensure that equipment is shut down, inoperable, and (where relevant) de-energized. This allows maintenance and repair work on the system to be performed safely. Any workplace scenario involving equipment that could lead to the inadvertent release of hazardous energy requires the use of lockout and Tagout procedures. In this context, “hazardous energy” includes not only electricity but other forms of energy such as pneumatic pressure, hydraulic pressure, and gas. The purpose of LOTO procedures is both to prevent direct exposure to this energy, as well as to prevent harm caused by any machinery or objects that could be moved by that energy (e.g., a pneumatic press accidentally being activated)
In the photo of today, we’ll look at the basics of lockout/Tagout and LOTO safety. This will include some basic definitions, relevant OSHA regulations and informational resources, and steps to follow when performing lockout.

What is Lockout/Tag out?
Lockout and Tagout are defined “Control of Hazardous Energy – Lockout and Other Methods” as the “placement of a lockout device on an energy-isolating device in accordance with an established procedure.” A lockout device is “a mechanical means of locking that uses an individually keyed lock to secure an energy-isolating device in a position that prevents energization of a machine, equipment, or a process.”
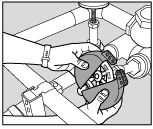
Lockout is one way to control hazardous energy. In practice, the lockout is the isolation of energy from the system (a machine, equipment, or process) which physically locks the system in a safe mode. The energy-isolating device can be a manually operated disconnect switch, a circuit breaker, a line valve, or a block (Note: pushbuttons, selection switches, and other circuit control switches are not considered energy-isolating devices). In most cases, these devices will have loops or tabs which can be locked to a stationary item in a safe position (de-energized position). The locking device (or lockout device) can be any device that has the ability to secure the energy-isolating device in a safe position. See the example of the lock and hasp combination in Figure 1 below.
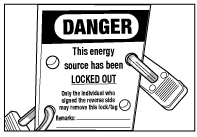
Tag out is a labeling process that is always used when the lockout is required. The process of tagging out a system involves attaching or using an information tag or indicator (usually a standardized label) that includes the following information:
- Why the lockout/tag out is required (repair, maintenance, etc.).
- Time and date of application of the lock/tag.
- The name of the authorized person who attached the tag and lock to the system.
Tool Box Talk: Lockout and Tagging
What does de-energization mean?
De-energization is a process that is used to disconnect and isolate a system from a source of energy to prevent the release of that energy. By de-energizing, the system, the risk that the system could inadvertently, accidentally, or unintentionally cause harm to a person through the release of hazardous energy is eliminated.
Why is lockout/tag out important?
Safety devices such as barrier guards or guarding devices are installed on systems to maintain worker safety while these systems are being operated. When activities such as maintenance, repair, or set-up; or the removal of jams, clogs, or misaligned feeds are performed, these safety devices may be removed if there are other controls in place to reduce or eliminate the hazards.
Having a lockout and Tagout program and procedures for these scenarios will reduce the risk of injury due to the unintended or inadvertent release of hazardous energy.
What is the purpose of a lockout/tagout program?
The purpose of a lockout Tagout program is to control hazardous energy. A lockout program should:
- Identify the types of:
- Hazardous energy in the workplace
- Energy-isolating devices
- De-energizing devices
- Guide the selection and maintenance of protective devices, hardware, and personal protective equipment (PPE)
- Assign duties and responsibilities
- Describe lockout procedures for all machines, equipment, and processes
- Determine shutdown, de-energizing, energizing, and start-up sequences
- Describe training requirements for authorized and affected workers
- Be audited for effectiveness
An effective lockout and Tagout program will help prevent:
- Contact with a hazard while performing tasks that require the removal, by-passing, or deactivation of safeguarding devices.
- The unintended release of hazardous energy (including stored energy).
- The unintended start-up or motion of machinery, equipment, or processes.
Who is responsible for the lockout program?
Each party in the workplace has a responsibility in the lockout program. In general:
Management is responsible for:
- Drafting, reviewing, and updating lockout procedures and program.
- Identifying the employees, machines, equipment, and processes included in the program.
- Providing the necessary protective equipment, hardware and appliances.
- Monitoring and measuring conformance with the program.
Supervisors are responsible for:
- Distributing protective equipment, hardware, and any appliance; and ensuring its proper use by employees.
- Making sure that equipment-specific procedures are established for the machines, equipment and processes in their area.
- Making sure that only properly trained employees perform service or maintenance that require lockout.
- Making sure that employees under their supervision follow the established lockout procedures where required.
Authorized individuals are responsible for:
- Following the procedures that have been developed.
- Reporting any problems associated with those procedures, the equipment, or the process of locking and tagging out.
( Download: Lock Removal Form)
What details should the lockout procedures and work instructions contain?
An organization will have one overall lockout program; however, for each unique machine or equipment, there will be a detailed procedure or work instruction that describes the steps to control the hazardous energy.
The written lockout procedure should specify:
- The specific machine, equipment, or process involved in the shutdown and isolation process.
- The hazardous energy present and the type of energy-isolating or de-energizing devices required.
- Where the lockout devices are required and how they are installed.
- The steps for shutting down, isolating, blocking, securing, and relieving stored or residual energy.
- The steps for placing and removing all lockout devices.
- How the isolation can be verified.
- How others in the area will be informed of the lockout and the return into service.
Procedures and work instructions identify how the lockout process is to be carried out and may include pictures or images of what is being described.
What are the basic steps of locking and tagging out a system?
Lockout and Tagout processes involve more than putting a lock on a switch. They are comprehensive step-by-step processes that involve communication, coordination, and training.
Please note the following definitions from CSA Z460-20:
Affected person – persons who are not directly involved in the work requiring the hazardous energy control, but who are (or may be) located in the work area.
Authorized person – a person who is qualified to engage in hazardous energy control because of knowledge, training, and experience and has been assigned to engage in such control.
E-Books: Safety The Safety Professionals Expanded Guide to LOCKOUT TAGOUT
General steps of a lockout and Tagout procedure include:
1. Prepare for Shutdown
The authorized person will identify the machine, equipment, or process that requires lockout, which sources of energy are present and must be controlled, and what lockout device will be used. This step involves gathering all required equipment (e.g., lockout devices, tags, etc.).
2. Notify all Affected Personnel
The authorized person will communicate the following information to notify affected persons:
- What is going to be locked/tagged out.
- Why it is going to be locked/tagged out.
- For approximately how long the system be unavailable.
- Who is responsible for the lockout/tag out, if not themselves.
- Who to contact for more information.
This information should also be present on the tag required for the lockout.
3. Equipment Shutdown
Follow shutdown procedures (either established by the manufacturer or employer). Equipment shutdown involves ensuring controls are in the off position, and verifying that all moving parts such as flywheels, gears, and spindles have come to a complete stop.
4. Isolation of System (De-energization)
Follow the lockout procedure for the identified machine, equipment, or process. Review the following isolation practices for various forms of hazardous energy:
- Electrical energy – Switch electrical disconnects to the off position. Visually verify that the breaker connections are in the off position. Lock the disconnects into the off position. NOTE: Only disconnect switches or breakers that you are trained or authorized to do so, especially at high voltages.

Hydraulic and pneumatic potential energy – Set the valves in the closed position and lock them into place. Bleed off the energy by slowly opening the pressure relief valves. Some procedures for pneumatic energy control may require that pressure relief valves be locked in the open position. Some procedures for hydraulic energy, for example in lifting devices, may require blocking.

- Mechanical potential energy – Carefully release energy from springs that may still be compressed. If this is not feasible, block the parts that may move if there is a possibility that the spring can transfer energy to it.
- Gravitational potential energy – Use a safety block or pin to prevent the part of the system that may fall or move.
- Chemical energy – Locate chemical supply lines to the system and close and lockout the valves. Where possible, bleed lines and/or cap ends to remove chemicals from the system.
For more types of energy, see Hazardous Energy Control Programs.
5. Dissipation (Removal) of Residual or Stored Energy
In general, examples include:
- Electrical energy – To find a specific method to discharge a capacitor for the system, contact the manufacturer for guidance. Many systems with electrical components, motors, or switch gears contain capacitors. Capacitors store electrical energy. In some cases, capacitors hold a charge and may release energy very rapidly. In other cases, capacitors are used to remove spikes and surges to protect other electrical components. Capacitors must be discharged in the lockout process in order to protect workers from electrical shock.
- Hydraulic and pneumatic potential energy – Setting the valves in the closed position and locking them into place only isolates the lines from more energy entering the system. In most cases, there will still be residual energy left in the lines as pressurized air or fluid. This residual energy can be removed by bleeding the lines through pressure relief valves. Verify depressurization or use flange-breaking techniques. Contact the manufacturer for more specific details, or if no pressure relief valves are available, what other methods are available.
- Gravitational potential energy – If possible, bring the equipment or machine to ground level.
- Chemical energy – If available, bleed lines and/or cap ends to remove chemicals from the system.
6. Lockout/Tag Out
When the system’s energy sources are locked out, there are specific guidelines that must be followed to make sure that the lock cannot be removed, and the system cannot be inadvertently operated. These guidelines include:
- Each lock should only have one key (no master keys are allowed).
- All keys must be removed from locks and kept with the person who applied the lock.
- There should be as many locks on the system as there are people working on it. For example, if a maintenance job requires 3 workers, then 3 locks should be present – each of the individuals must place their OWN lock on the system. Locks can only be removed by those who installed them and should only be removed using a specific process – see step 9 below.

7. Verify Isolation
Verify that the system is properly locked out before beginning any work. Verification can take place in several ways:
- The machine, equipment, or process controls (push buttons, switches, etc.) are engaged or activated and the result is observed. No response means isolation is verified. Return controls to the safe position (off).
- Visual inspection of:
- Electrical connections to make sure they are open.
- Suspended parts are lowered to a resting position or blocked to prevent movement.
- Other devices that restrain machine or process movement.
- Valve positioning for double block and bleed (for pipes or ducts) – closing two valves of a section of a line, and then bleeding (or venting) the section of the line between the two closed valves.
- Presence of solid plate used to absolutely close a line – called line blanking (for pipes or ducts).
- Any other acceptable method of energy isolation.
- Testing of the equipment:
- Test circuitry (should be done by a certified electrician) – Note: equipment with capacitors needs to be cycled until all energy is drained.
- Check pressure gauges to make sure hydraulic and pneumatic potential energy has been removed.
- Check temperature gauges to make sure thermal energy has been discharged.
Choose the method that will make sure that the energy to the system has been isolated without creating other hazards during the verification.
8. Perform Maintenance or Service Activity
Complete the activity that required the system to be locked out.
9. Remove Lockout and Tagout devices
To remove locks and tags from a system that is now ready to be put back into service, the following general procedure can be used:
- Inspect the work area to make sure all tools and items have been removed.
- Confirm that all employees and persons are safely located away from hazardous areas.
- Verify that controls are in a neutral position.
- Remove devices in the opposite order in which they were installed and re-energize the system.
- Notify affected employees that servicing is completed.
*Note: It is good practice to make sure any individual who placed a lock on the system should also be present when the system is restarted. This practice helps make sure those employees working on the system are not in a hazardous area when the machine is restarted.
Video: Lockout – Tagout Safety Training
Download the infographic
Lockout and Tagout Safety
Procedures of Lockout/Tagout at Chemical Plants
More Photos
- What are the Best Practices for Managing Subcontractor Risk
- Photo of the day: 10 Essential Safety Tips for Driving in Hot Weather Conditions
- Photo of the day: best workplace safety tips
- Photo of the day: The Importance of Stop Work Authority in Maintaining Workplace Safety
- Photo of the day: Tomorrow’s Reward for Working Safely Today: Cultivating a Culture of Safety
- Photo of the day: Preventing slips and trips at work
- Photo of the day: Learn the DRSABCD action Plan
- Working with Electricity Electrical Accidents Guide for Electrical Workers
- Photo of the day: Hearing Protection Device Selection
- Photo of the day: If An Earthquake Shakes You-Infographic free
- Fire Safety Posters Free Download
- Photo of the day: First Aid for Electrical Burns-Infographic free
- Infographic: First Aid for Cuts and Scrapes free download
- Photo of The day: Work Safe with Lasers-Laser Safety free
- Photo of the day: Working Safely with chemicals and chemical Management
- Photo of the day: Safe work practices when using MEWPs ( updated)
- Photo of the day: Preventing Common Kitchen Hazards
- Photo of the day: Safe handling of Gas Cylinders and lecture bottles
- Photo of the day: Forklift Stability Triangle
- Photo of the day: Defective Tools Safe Work Practice
- Photo of the day: Lift With Your Legs Not With Your Back
- Photo of the day: First Aid for burns
- Photo of the day: The 7 Principles of HACCP
- Photo of the day: Working Safely with Suspended Loads
- Photo of the day: Heat Stroke First Aid and safety posters
- Photo of the day: Near-Miss Reporting and Posters
- Photo of the day: Ergonomic chair and office chair safety tips
- Photo of the day: Whole Body Vibration
- Photo of the day: Substation Safety Equipment
- Photo of the day: Bypassing Safety Controls Rules
- Photo of the day: Lightning Safety Tips
- Photo of the day: Overhead Power lines Clearance
- Photo of the day: Floor Marking
- Photo of the day: Types of Foot Protection
- Photo of the day: Types of Hand Protection
- Photo of the day: Lockout and Tagout Safety
- Photo of the day: Fall Protection Plans
- Photo of the day: Flood Safety Tips
- Photo of the day: Read All Labels Work safe
- Photo of the day: Run Project safely with Crane Hand Signals
- Photo of the day: Flagman and Traffic control
- Photo of the day: Managing Risks of Exposure to Solvents in the workplace
- Photo of the day: Scissor Lift Safety
- Photo of the day: HSE Bulletin Board
- Photo of the day: Arc-Fault Circuit Interrupters (AFCI)
- Photo of the day: Safe use of ladders and step ladders
- Photo of the day: Concrete Truck Driver Hand Signals
- Photo of the day: Extension Cord Safety Tips
- Photo of the day: Protect your Head
- Photo of the day: choosing the right Anchorage
- Photo of the day: Work-Related Asthma
- Photo of the day: Top FIVE Heavy Equipment Construction Site Safety Tips
- Photo of the day: sun safety in the workplace
- Photo of the day: Cannabis and Impairment in the Workplace
- Photo of the day: Position for safety and comfort-Safety Tips
- Photo of the day: Generator Safety
- Photo of the day: Controlling COVID-19 in the Workplace-Physical Barriers
- Photo of the day: Manual Material handling
- Photo of the day: Personal Protective Equipment last resort
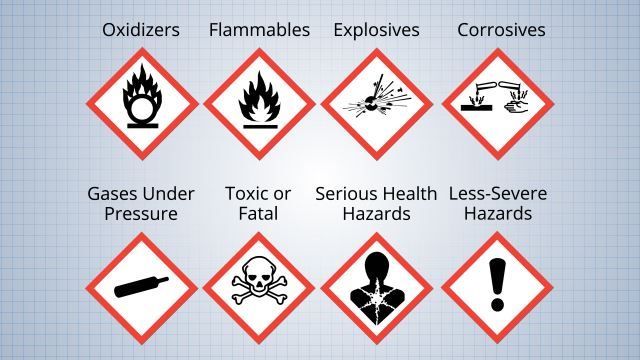
- Photo of the day: WHMIS 2015 – Pictograms
- Photo of the day: Indoor Air Quality
- Photo of the day: Noise in the affected workplace
- Photo of the day: Fatigue at Work
- Photo of the day: Don’t be Driven to Distraction
- Photo of the day: working in heat and Humidex Rating
- How to use Plate Clamps Safely: Safety Moment#34
- Photo of the day: Sitting at work
- Photo of the day: 5 ways to reduce the risk of Slipping and Tripping
- Photo of the day: Preventing the spread of contagious illness
- Photo of the day: Incident Investigations
- Photo of the day: 10 Scaffold Safety Essentials
- Photo of the day: Effective Health and Safety Committees
- Photo of the day: New worker Orientation & Safety Orientation checklist
- Photo of the day: Workplace Inspection
- Photo of the day: musculoskeletal disorders
- Photo of the day: Emergency preparedness in the workplace
- Photo of the day: Mental health in the workplace
- Photo of the day: Trenching Safety Tips That Can Save a Life


