To get a quality weld, you need to use the right amount of heat. Too much can burn through the metal, cause distortion, or weaken its structure. Too little can result in poor penetration and a weak joint. Managing the weld puddle’s temperature is a key skill for working on both thin and thick materials without causing warping or sacrificing penetration.
Understanding the Importance of Heat Input Control in Welding
Heat input is the amount of electrical energy supplied to the weld per unit length of the joint. It is a critical metric because it determines the cooling rate of the weldment. The cooling rate directly affects the microscopic structure of the metal, which in turn dictates its mechanical properties.
When thermal energy is improperly managed, a cascade of structural issues can occur. Excessive thermal buildup causes base metals to expand and contract unevenly, leading to severe warpage. This is especially true for materials like stainless steel and aluminum, which have high thermal conductivity and expansion rates. Furthermore, extreme temperatures can alter the metallurgical structure of the heat-affected zone, making the metal brittle and highly susceptible to cracking under stress.
Conversely, insufficient thermal energy prevents the filler metal from fusing properly with the base material. This lack of fusion creates stress risers and weak points. By mastering temperature control, you ensure a consistent, strong bond that maintains the base material’s original properties as much as possible.
Scientific Fundamentals: Calculation and Impact on Material Properties
You do not need an advanced engineering degree to understand the science behind your arc. The basic formula for calculating heat input is highly practical and easy to apply:
Heat Input = (Voltage x Amperage x 60) / Travel Speed
In this equation, voltage and amperage represent the electrical power generated by your machine, while travel speed is how fast you move the torch across the joint. The result is typically measured in joules per inch (or joules per millimeter).
The output of this calculation tells you how slowly or quickly the metal will cool. High heat input results in a slower cooling rate. A slow cooling rate generally produces a wider heat-affected zone and larger grain structures in the metal, which can decrease the material’s toughness. Low heat input results in a faster cooling rate, keeping the heat-affected zone narrow and the grain structure fine, thereby preserving the base metal’s strength.
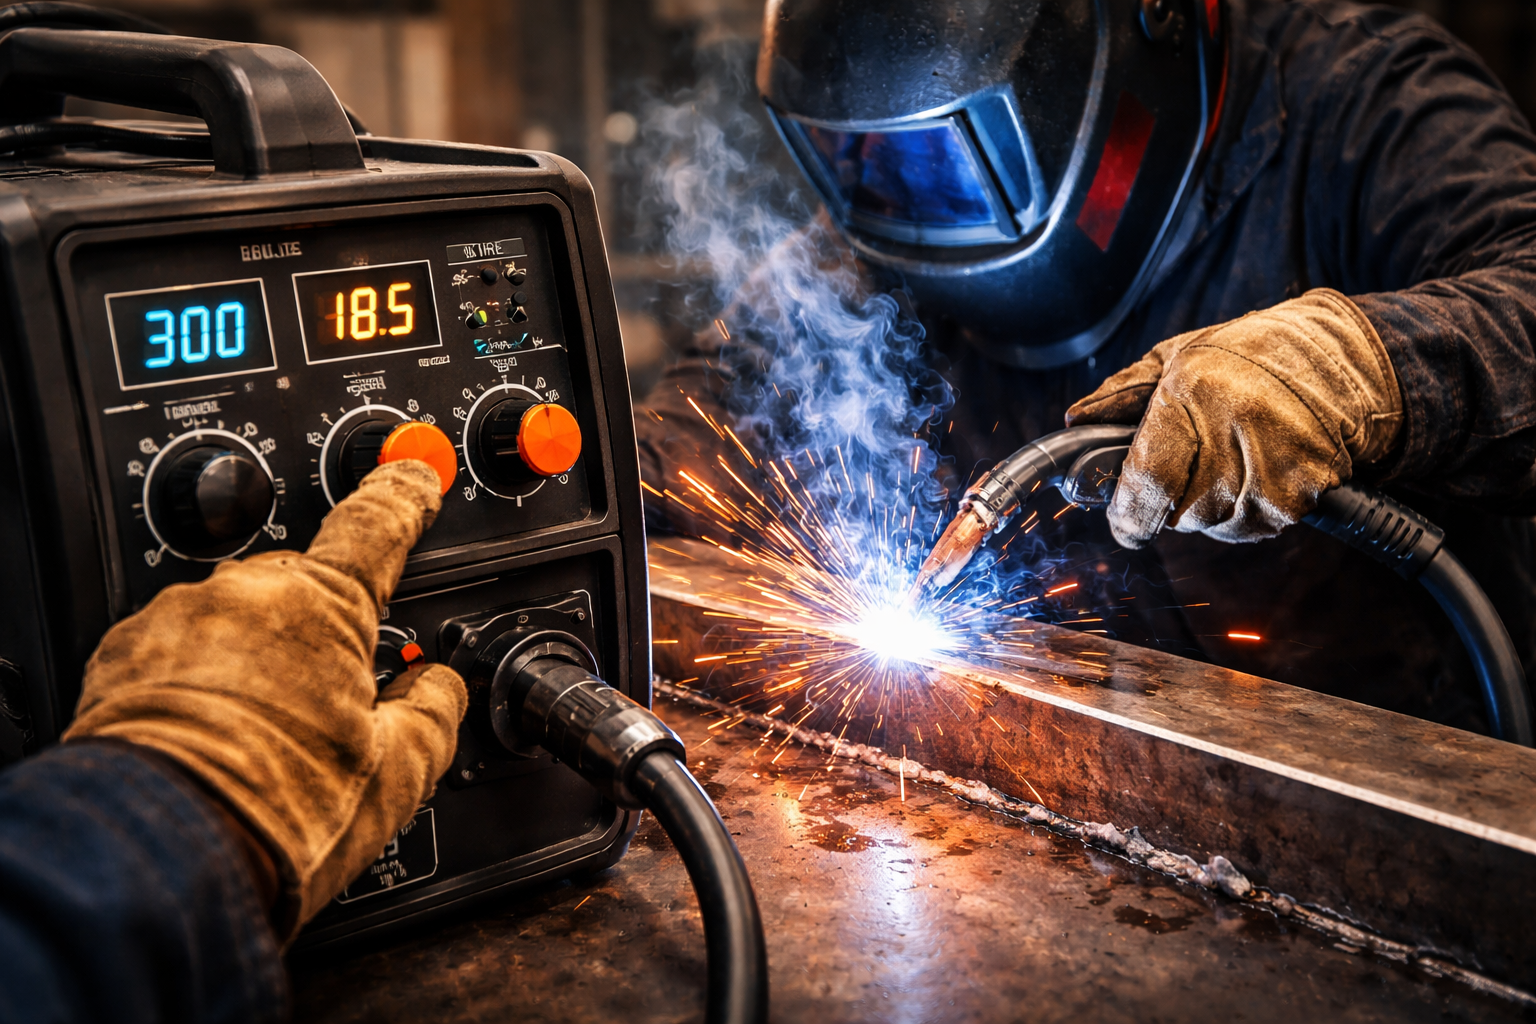
Key Variables: Voltage, Amperage, and Travel Speed
To manipulate the equation above, you must adjust the three primary variables. Understanding how they interact is the key to producing professional-grade joints.
Voltage
Voltage controls the electrical pressure of your arc. It determines the arc length and directly affects the width of the weld bead. Higher voltage creates a wider, flatter bead and increases the overall thermal energy transferred to the work piece. If your bead is piling up too high, increasing the voltage slightly can help it wet out and flatten, but you must monitor the resulting temperature increase carefully.
Amperage
Amperage dictates the flow of electrical current and determines the depth of penetration. Higher amperage pushes the arc deeper into the base metal. While high amperage is necessary for thick materials, it introduces a massive amount of thermal energy. When welding thin sheet metal, you must lower the amperage to prevent the arc from punching straight through the material.
Travel Speed
Travel speed is the physical rate at which you move the torch along the joint. It is your most immediate form of temperature control. Moving faster reduces the amount of time the arc spends over any single spot, thereby lowering the total heat input. Moving slower allows the thermal energy to build up, resulting in deeper penetration and a wider heat-affected zone.
Advanced Techniques: Pulse Welding and Weave Patterns
Once you understand the basic variables, you can implement advanced strategies to refine your temperature management even further.
Pulse Welding
Pulse welding is a modified spray transfer process where the power source rapidly alternates between a high peak current and a low background current. The peak current pinches off a droplet of wire and propels it into the joint, while the background current maintains the arc without adding excess thermal energy. This alternating cycle gives the weld puddle a fraction of a second to cool, significantly reducing the overall temperature of the workpiece. Pulse welding is highly effective in both manual and robotic welding applications for managing thermal buildup on heat-sensitive materials.
Weave Patterns
The physical manipulation of the torch also impacts thermal transfer. A standard stringer bead—moving in a straight line with minimal side-to-side motion—keeps travel speed relatively high and thermal energy focused. Weave patterns, where you oscillate the torch across the joint, spread the thermal energy over a wider area. While weaving can help fill wide gaps, it slows your overall forward progression, which substantially increases the total thermal energy deposited into the metal. Use weaves sparingly on thin materials.
Practical Tips for Shielding Gas and Wire Feed Speed
Beyond the primary machine settings and torch movements, your consumables also play a massive role in thermal transfer.
The shielding gas mixture you choose alters how hot the arc burns. Pure argon produces a relatively cool, stable arc, making it ideal for thin aluminum. Adding carbon dioxide (CO2) to the mixture increases the thermal conductivity of the arc, resulting in broader penetration and a hotter puddle. For example, a 75% Argon / 25% CO2 mix runs much hotter than a 90% Argon / 10% CO2 mix. Choose your gas blend based on the thickness of your material.
Wire feed speed is intimately tied to amperage in processes like MIG welding. Increasing the wire feed speed automatically increases the amperage to melt the extra wire, thereby raising the temperature. Fine-tuning your wire feed speed ensures you deposit enough filler metal without inadvertently overheating the joint.
Read: Liquid Hydrocarbon Storage Tank Fires system
Common Mistakes to Avoid to Prevent Distortion and Warpage
Even experienced fabricators can run into trouble if they overlook basic preparation and technique. Avoid these common errors to keep your workpieces flat and structurally sound:
- Moving Too Slowly: The most common mistake is lingering over the puddle to ensure penetration. If the material is getting too hot, increase your amperage slightly and move faster.
- Skipping Joint Preparation: Failing to bevel thick plates forces you to use excessive amperage to achieve full penetration. Proper beveling allows you to reach the root of the joint with lower, more controlled settings.
- Ignoring Heat Sinks: When working on thin metal, clamp thick pieces of copper or aluminum behind the joint. These heat sinks draw thermal energy away from the weld zone, preventing burn-through and warpage.
- Welding in One Continuous Pass: On long joints, running one continuous bead introduces massive, concentrated thermal expansion. Instead, use stitch welds (short, spaced-out beads) or the back-step technique to distribute the thermal load evenly across the entire part.
Conclusion
Controlling the thermal energy in your arc is a continuous balancing act between machine settings, consumable selection, and physical technique. By understanding the mathematical relationship between voltage, amperage, and travel speed, you can accurately predict how your metal will behave before you even strike an arc.
Read: A free detailed guide for Welding and metal fabrication Safety